Article
Complete AI Image Editing Workflow: From Upload to Perfect Result in 5 Minutes
Learn the exact workflow professionals use to edit images 10x faster with AI. From upload to final result in just 5 minutes. Complete step-by-step guide.
Learn the exact workflow professionals use to edit images 10x faster with AI. From upload to final result in just 5 minutes. Complete step-by-step guide.
Picture this: You need to prepare 20 product photos for your website. With traditional tools, you're looking at 3-4 hours of work. Opening Photoshop. Editing each photo. Resizing for different uses. Saving multiple versions. Uploading. Exhausting.
What if I told you that same work takes 15-20 minutes with an AI image editor? Not by cutting corners. Not by sacrificing quality. Just by having a better workflow.
This guide shows you the exact step-by-step workflow professionals use to edit images 10x faster with AI generation technology. No fluff. Just the exact process that works.
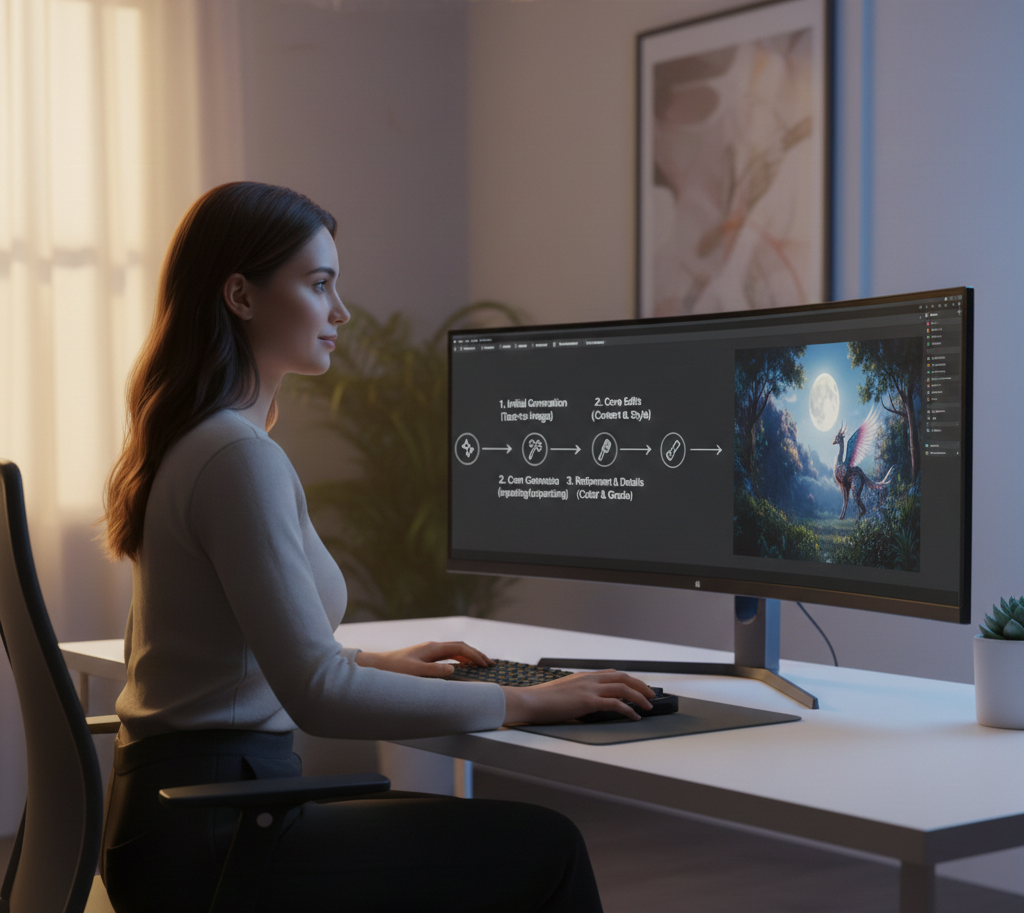
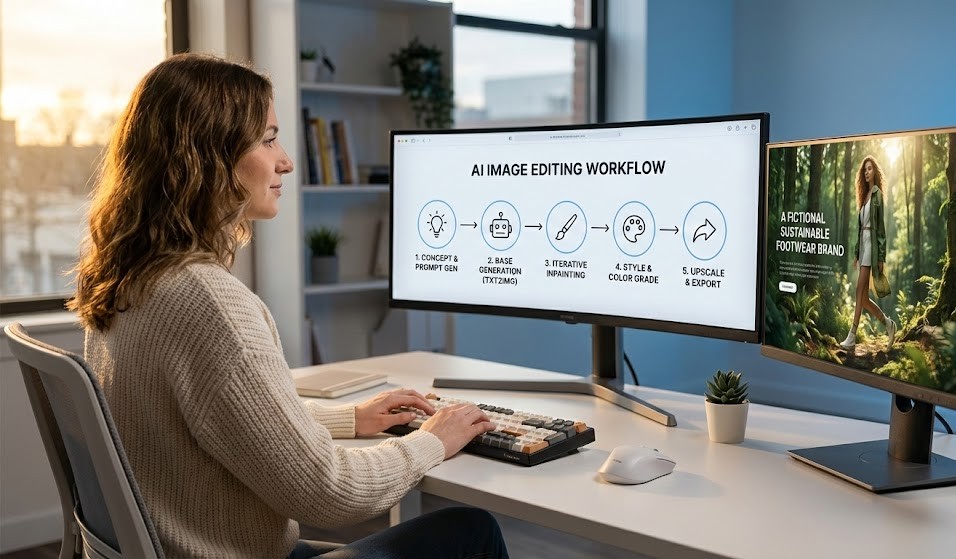
Here's the bird's eye view of the entire process. We'll break down each step in detail:
Phase 1: Preparation (2 minutes)
1. Gather all images in one folder
2. Quick quality check
3. Decide final use cases
4. Open your AI image editor
Phase 2: Enhancement (5-10 minutes)
5. Batch upload all images
6. Apply AI enhancement
7. Quick review
8. Download enhanced versions
Phase 3: Specific Edits (5-10 minutes)
9. Background removal (if needed)
10. Upscaling (if needed)
11. Special effects or adjustments
12. Quality check each
Phase 4: Multi-Platform Export (3-5 minutes)
13. Batch resize for all platforms
14. Organize into platform folders
15. Final quality check
16. Upload or deploy
Total Time: 15-25 minutes for 20 images
Let's break down each phase in detail.
Good preparation cuts editing time in half. Here's exactly what to do:
Step 1: Gather Images (1 minute)
• Create a "To Edit" folder on desktop
• Move all images needing editing into it
• Name them clearly if not already
• Keep originals in "Originals" backup folder
Step 2: Quick Quality Check (1 minute)
• Quickly scan through all images
• Delete obviously bad ones (blurry, wrong subject, etc.)
• Flag any that need special attention
• Better to delete bad ones now than waste time editing them
Step 3: Decide Use Cases
Know where these images will go:
• Social media? Which platforms?
• Website? Which pages?
• Email? Print?
• This determines your output sizes and formats
Step 4: Open Your AI Tool
• Go to DesignBee or your chosen AI editor
• Make sure you're logged in
• Have batch processing ready
• You're ready to edit!
This preparation seems minor but saves massive time later.
[IMAGE PLACEHOLDER: Preparation checklist]
This is where AI really shines. Batch enhancement of all images at once.
Step 5: Batch Upload (30 seconds)
• Select all images from your "To Edit" folder
• Drag and drop into the AI tool
• Or use "Upload Multiple" button
• Wait for upload (usually 10-30 seconds for 20 images)
Step 6: Apply Enhancement (5-7 minutes)
• Select all uploaded images
• Click "Enhance All" or batch enhance option
• Choose enhancement type (general, portrait, landscape, etc.)
• Let AI process all images
• Modern tools process 20 images in 2-5 minutes
Step 7: Quick Review (2-3 minutes)
• Quickly check each enhanced image
• Compare before/after
• Flag any that look wrong (rare but possible)
• Re-enhance flagged ones with different settings
• Most will be perfect on first try
Step 8: Download Enhanced Versions
• Select all approved images
• Click "Download All"
• Save to "Enhanced" folder
• Keep organized!
You've now improved 20 images in about 10 minutes. Traditional editing? 2-3 hours.

Now handle image-specific needs. Not every image needs every edit.
Background Removal (If Needed)
Product photos, headshots, and certain graphics need backgrounds removed.
Process:
1. Select images needing background removal
2. Use AI background remover
3. Batch process all at once
4. Review and download
5. Save as PNG to preserve transparency
Time: 2-3 minutes for 20 images
Upscaling (If Needed)
Images too small for intended use? Upscale them.
Process:
1. Identify images that are too small
2. Use AI upscaling
3. Choose appropriate factor (2x, 4x, etc.)
4. Process and download
5. Replace original enhanced versions with upscaled
Time: 3-5 minutes depending on upscale factor
Special Adjustments
Occasionally you need specific tweaks:
• Crop to specific composition
• Add text or graphics
• Apply specific filters
• Manual color adjustments
• These are image-specific, not batch
Time: 30-60 seconds per image needing special work
Quality Check
Before moving to export:
• View each edited image at actual size
• Zoom to 100% on a few random ones
• Check edges, colors, sharpness
• Better to catch issues now than after upload
Time: 2-3 minutes
This is where workflow optimization really pays off.
Batch Resize Strategy
Instead of resizing images one platform at a time, do all platforms at once per image.
Example for product photo:
• Website main image: 2000 x 2000
• Website thumbnail: 400 x 400
• Instagram square: 1080 x 1080
• Facebook: 1200 x 630
• Email newsletter: 600 x 600
Traditional way: Resize to each separately = 5 × 20 = 100 resize operations
Batch way: Select all 5 sizes, process once per image = 20 batch operations
Time saved: 15-20 minutes!
Step 13: Batch Resize (3-4 minutes)
1. Upload your final edited images
2. Use batch resize feature
3. Select all needed output sizes
4. Process all at once
5. Download organized by size or platform
Step 14: Organize Files (1-2 minutes)
Create clear folder structure:
```
Project Folder/
├── Originals/
├── Enhanced/
├── Final/
│ ├── Website/
│ │ ├── Main/
│ │ └── Thumbnails/
│ ├── Instagram/
│ ├── Facebook/
│ └── Email/
```
Clear organization saves time finding files later.
Step 15: Final Quality Check
• Open 2-3 random images from each platform folder
• Confirm correct sizes
• Verify quality
• Check file sizes aren't too large
Time: 1-2 minutes
Step 16: Upload/Deploy
• Upload to respective platforms
• Update website
• Schedule social media posts
• Send to client/team
• Done!
Let me show you this workflow in action with real numbers.
The Task:
Sarah launches 15 new jewelry products. Each needs photos for:
• Website (3 sizes each)
• Instagram (2 sizes each)
• Facebook
• Email newsletter
Total: 7 versions × 15 products = 105 images needed
Old Workflow (Photoshop):
• Edit each photo: 15 × 10 min = 150 min
• Remove backgrounds: 15 × 5 min = 75 min
• Resize each version: 105 × 1 min = 105 min
• Organize and export: 20 min
Total: 350 minutes (5.8 hours)
AI Workflow (DesignBee):
• Preparation: 3 min
• Batch enhance all 15: 5 min
• Batch remove backgrounds: 3 min
• Batch resize to all sizes: 8 min
• Quality check and organize: 5 min
Total: 24 minutes
Time saved: 326 minutes (5.4 hours)!
That's a 93% time reduction.
And the quality? Better. The AI enhancement actually improved the photos beyond what Sarah could do manually.
[IMAGE PLACEHOLDER: Time comparison chart]
The biggest time saver in AI workflows is batch processing. Let's understand it fully.
What Is Batch Processing?
Instead of editing images one at a time, you edit many at once with the same settings.
What Can Be Batched?
In modern AI image editors:
• Enhancement: Yes
• Background removal: Yes
• Upscaling: Yes
• Resizing: Yes
• Format conversion: Yes
• Compression: Yes
• Watermarking: Yes
When to Batch:
• Images need same edits
• Similar subjects (all products, all portraits, etc.)
• Consistent output requirements
• More than 5 images
When NOT to Batch:
• Images need different edits
• Varied subjects needing specific treatment
• Only 1-2 images
• Very different source qualities
Batch Processing Tips:
1. Test on 1-2 images first
2. Once settings look good, batch the rest
3. Don't batch images that need individual attention
4. Group similar images for batching
Mistake 1: Editing One-by-One
Wrong: Edit image 1, complete it, start image 2
Right: Batch all similar operations
Impact: Wastes 60-80% of time
Mistake 2: Not Planning Outputs
Wrong: Edit now, decide sizes later
Right: Know all needed sizes before starting
Impact: Have to redo work, double the time
Mistake 3: Over-Editing
Wrong: Spend 10 minutes perfecting each image
Right: AI enhancement + quick check is usually enough
Impact: Perfectionism costs hours for minimal gain
Mistake 4: Poor Organization
Wrong: Save files randomly
Right: Clear folder structure from the start
Impact: Waste time finding files later
Mistake 5: Not Using Presets
Wrong: Manually enter sizes every time
Right: Save common sizes as presets
Impact: Waste time on repetitive tasks
Mistake 6: Forgetting to Save Originals
Wrong: Overwrite original with edited version
Right: Always keep originals in separate folder
Impact: Can't re-edit later if needed
Once you master the basics, these optimizations save even more time:
Optimization 1: Preset Templates
Create saved workflows for common tasks:
• "Product Photo Workflow": Enhance + Remove BG + Resize (5 sizes)
• "Social Media Workflow": Enhance + Resize (Instagram, Facebook, Twitter)
• "Blog Post Workflow": Enhance + Resize (3 web sizes)
One click = entire workflow runs automatically
Optimization 2: Hotkeys and Shortcuts
Learn keyboard shortcuts:
• Upload: Ctrl/Cmd + U
• Download: Ctrl/Cmd + D
• Enhance: Ctrl/Cmd + E
• Select All: Ctrl/Cmd + A
Saves 2-3 seconds per operation = minutes over 20 images
Optimization 3: Dual Monitor Setup
• AI tool on main monitor
• File browser on second monitor
• Drag and drop becomes effortless
• No window switching
Optimization 4: Folder Watch
Some tools can auto-process folders:
• Set up watched folder
• Drop images in = automatic processing
• Grab processed images from output folder
• Completely automated
[IMAGE PLACEHOLDER: Advanced optimizations]
E-commerce Product Workflow:
1. Photo products on consistent background
2. Upload all to AI editor
3. Batch enhance
4. Batch remove backgrounds
5. Batch resize (main, thumbnail, zoom sizes)
6. Download organized by product
7. Upload to store
Time: 1-2 min per product
Social Media Content Workflow:
1. Create or gather 10-20 images
2. Batch enhance all
3. Batch resize for each platform
4. Schedule posts
Time: 15-20 min for week's content
Blog Post Workflow:
1. Find/create 3-5 images per post
2. Enhance all
3. Resize to blog standard sizes
4. Compress for fast loading
5. Upload to CMS
Time: 5-7 min per post
Event Photography Workflow:
1. Import 100-200 event photos
2. Quick cull (delete obvious bad ones)
3. Batch enhance remaining
4. Select best 30-40 for sharing
5. Resize for web gallery
6. Upload to sharing platform
Time: 30-45 min for entire event
Best results come from using tools that work together:
All-in-One Approach:
Use DesignBee or similar all-in-one AI image editor:
• Enhancement
• Background removal
• Upscaling
• Resizing
• All in one tool = no file switching
Benefits:
• No downloading between tools
• Consistent interface
• Combined workflows
• One subscription
• Faster overall
When to Use Multiple Tools:
• Specialized needs
• Best-in-class for specific features
• Already paid for specific tools
• Very high-end work
For most people, all-in-one saves more time than best-of-breed specialist tools.
Build quality checks into workflow at key points:
Checkpoint 1: After Upload
• Quick scan thumbnails
• Confirm all uploaded correctly
• No corrupted files
• Time: 30 seconds
Checkpoint 2: After Enhancement
• Compare before/after on 3-5 images
• Check quality on various image types
• Adjust settings if needed
• Time: 1-2 minutes
Checkpoint 3: After Special Edits
• Verify backgrounds properly removed
• Check upscaling didn't create artifacts
• Confirm edits applied correctly
• Time: 2-3 minutes
Checkpoint 4: After Resize
• Open one image per size
• Confirm dimensions correct
• Verify quality maintained
• Check file sizes reasonable
• Time: 1-2 minutes
Checkpoint 5: Before Upload
• Final review of delivery files
• Confirm organization
• Verify completeness
• Time: 1-2 minutes
Total quality time: 6-10 minutes for entire workflow. Catches problems early = saves hours of rework.
Track these metrics to improve over time:
Time Per Image:
• Goal: Under 1 minute per image for batch work
• Track: Total time / number of images
• Improve by: Better batching, less perfectionism
Revision Rate:
• Goal: Under 5% need re-editing
• Track: Images re-edited / total images
• Improve by: Better quality checks, learning AI tool
Time to First Publish:
• Goal: Under 20 minutes from start to first platform
• Track: Clock time from opening tool to first upload
• Improve by: Streamlined workflow, presets
Batch Efficiency:
• Goal: 80%+ of work batched vs individual
• Track: Batch operations / total operations
• Improve by: Better planning, grouping similar work
What gets measured gets improved!
Adapt this template to your specific needs:
My Pre-Workflow Checklist:
□ Gather all images to edit
□ Delete obvious rejects
□ Know where images will be used
□ Have output size requirements ready
□ AI image editor open and ready
My Enhancement Process:
□ Batch upload all images
□ Apply [insert your preferred enhancement type]
□ Quick review
□ Download to [insert your folder name]
My Specific Edits:
□ Background removal for [insert image types]
□ Upscaling for [insert use cases]
□ Special adjustments: [insert your common needs]
□ Quality check
My Export Process:
□ Batch resize to: [list your standard sizes]
□ Save to folder structure: [insert your structure]
□ Final quality check
□ Upload to: [list your platforms]
Print this template. Fill in your specifics. Follow it every time. Consistency = speed.
This Week:
1. Choose your AI image editor (try DesignBee)
2. Practice basic workflow on 10 images
3. Time yourself
4. Identify bottlenecks
5. Optimize
This Month:
1. Create your custom workflow template
2. Set up folder structure
3. Create presets for common tasks
4. Process 50-100 images using workflow
5. Refine based on experience
This Quarter:
1. Workflow becomes automatic
2. Process hundreds of images efficiently
3. Teach workflow to team if applicable
4. Enjoy 10x productivity improvement
The sooner you start, the sooner you're saving hours every week.
A good workflow is the difference between struggling with image editing and breezing through it effortlessly.
AI generation technology makes each individual step faster. But combining AI with smart workflow makes the entire process 10x faster.
Traditional editing: 3-5 hours for 20 images
AI editing without workflow: 1-2 hours
AI editing WITH workflow: 15-25 minutes
That's the power of workflow optimization.
Most people focus on learning more tools or techniques. But the biggest gains come from organizing the work you already know how to do.
Build your workflow. Follow it consistently. Watch your productivity skyrocket.
Ready to build your perfect workflow? Start with DesignBee's all-in-one AI image editor. Enhancement, background removal, upscaling, resizing, and more in one tool. Free to try. Build your 10x faster workflow today!